
BEFORE YOU BEGIN
- It is very strongly recommended you practice with a knife of little value.
- Serrated and ceramic blades should not be used on a whetstone.
- Never sharpen the blade flat against the stone. It will scratch the blade’s surface and can cause chipping.
- Always!!!!!! keep the fingers of your guiding hand above the knife and whetstone!
- Sporadically apply water to the stones when sharpening. Water combines with the stone to create a “slurry”, facilitating sharpening.
- Periodically hone and sharpen your knives while they’re relatively sharp. Waiting for knives to dull makes them take significantly longer to sharpen.
- Use a separate towel or sponge to clean each side of the whetstone. Allow them to dry in a well-ventilated area before storing.
- After sharpening, rinse your knife with warm water and allow to dry before storing.
1. PREPARING THE WHETSTONE KIT
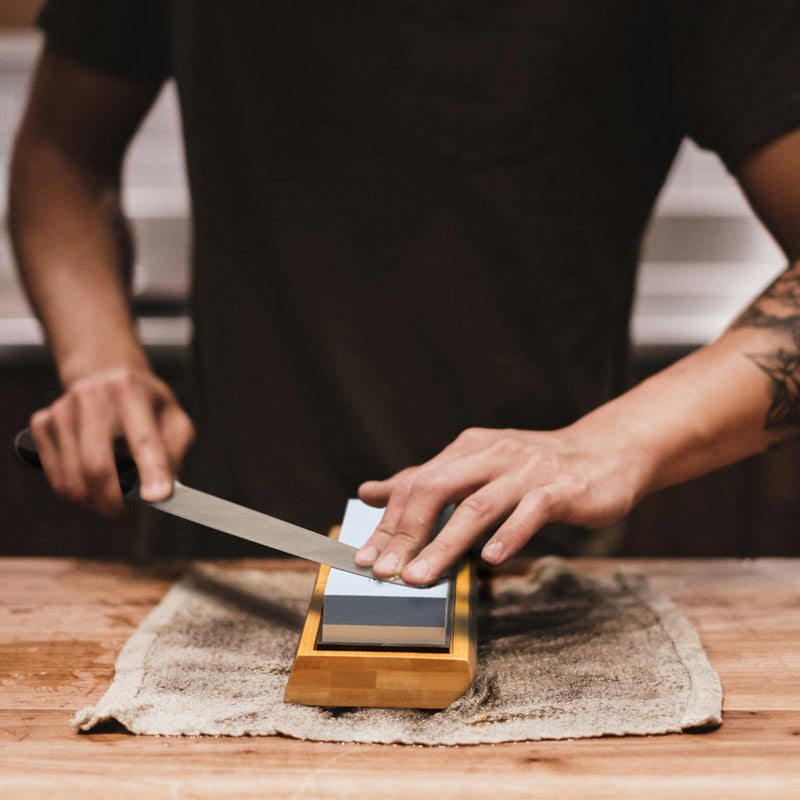
After soaking the whetstone in cold water for 10 minutes, place it into the non-slip silicone stone holder with the medium-coarse #1000-Grit side facing up. Then place into the recessed area of the bamboo base with the stone face up.
2. HOLDING THE KNIFE

Using your primary hand, and with the blade facing toward you, (1) place your thumb just above the heel, (2) place your index finger along the top of the spine, and (3) wrap your remaining three fingers around the knife’s handle. This will help you keep your wrist locked (in a straight line with your forearm) and maintain your desired sharpening angle.
3. FIND & MAINTAIN YOUR ANGLE

With the knife at a 45° angle on the stone, lift the knife's spine until you feel the blade edge's angle. KESSAKU knives have an angle of either 14° or 16° per side, depending on the series you have chosen. Most other knife manufacturers also list the angle of their blades on their websites. Placing the spine of your knife on top of two quarters, while letting the blade touch the whetstone will provide an angle of approximately 15°.

If you are new to sharpening with a whetstone, we recommend using the "Magic Marker Method" to help maintain your angle. Simply draw along both sides of the blade edge. This enables you to see where you have sharpened, and any areas you may have missed. It also helps you gauge your angle and make any necessary adjustments. Any leftover marker residue can be removed with acetone.
4. HOW TO SHARPEN

Always keep your guiding fingers in the center of the whetstone. Apply steady pressure across the blade’s surface with two or three fingertips placed close to the cutting edge, while constantly maintaining the proper angle for your blade’s edge against the stone.
Starting with the blade’s heel, push the knife forward with slight and consistent pressure. Relax the pressure as you pull it back towards you, keeping the (diagonally positioned) blade going up and down the center of the whetstone in a straight line. After working on the heel for a few minutes, continue this same process for each section of the blade, moving from the heel upward to the blade’s tip.
When working on a knife with a curved tip, like a chef's knife, you’ll want to follow its curve by lifting your elbow to raise the handle slightly as you push the knife away from you, and lower the handle slightly as you pull it back.
5. FEEL THE BURR

A “burr” will form on the blade’s side opposite to the one you’re working on when sharpening. A burr is curved metal along the unsharpened side’s edge that feels like a small ridge. The goal is to sharpen one side of the blade until the burr forms on the opposite side. This indicates the side you’re working on is done.

To check the burr, you’ll want to run your fingertip along the opposite side’s edge (be careful to only feel for this on the side of the edge, NOT the cutting edge itself). Once you feel the burr has formed solidly across the entire length of the edge (from the heel to the tip), it’s time to sharpen the other side.
NOTE: Knives made from higher quality steel are harder to sharpen. If you haven’t been able to raise a burr, continue sharpening both sides of the knife (redrawing the magic marker on the edge as needed) until you’re able to raise one.
6. REPEAT STEPS 4 & 5 ON THE BLADE’S OTHER SIDE
7. FEEL THE BURR II & BYE BYE, BURR!
The burr now acts as an indicator when a new edge is formed after adequately sharpening both sides of the blade. This last burr, having served its purpose, now needs to be removed. Just give the blade a few passes along the whetstone until the last burr is removed.
8. POLISHING
To finish, turn the whetstone over so that the 6000-Grit side is facing up and splash with a little water. Now, finish your knife to restore its surface shine and sharp edge by giving your blade’s edge a few gentle passes across the stone using light pressure. You’ll likely only need a minute or two per side to achieve this.
9. TESTING
After completing step #8 (Polishing) with the fine 6000-Grit side, your knife should pass the Paper Test for sharpness. Simply hold a piece of paper (it's best to use magazine or newspaper, as standard printer paper is generally easier to cut) while gliding the knife through it in a straight line down.

Leave a comment